Adding Users to Groups
When you click the Users menu, you can choose between adding one user or adding multiple users. If you select Add one, a form appears with two options:
- Add and invite user: Enter the user’s first name, last name, and email address to add them to a group. Once you click the Add User button, an email is sent to the user based on the email message settings set up by SoFA. The user is added to the list of users in the group and they take up a seat in your group, and their status is set to Not Started. If you add a user that already exists on the site, the system will automatically assign a key, add them to the group and send the Add and invite (existing user) email. They then occupy a seat in the group just like a new user.
- Send enrollment key: Enter the user’s first name, last name, and email address to send them the Send enrollment key email. Once that user registers and redeems that key, they take up a seat in the group, are enrolled in the group and can begin group courses.

Setting a password here does allow users without a valid email address to be created. Simply use a placeholder email address and password and this account information can be provided to a student to sign in.
Removing Users from Groups
To remove users from a group, select the users you would like to remove from the Enrolled User list, and a Remove User(s) button will appear. Click on the Remove User(s) button. You will be prompted to confirm your action.
Depending on the options set by your site administrator, you may only be able to remove group members before they have enrolled and begun their courses. Once a learner has begun completing the courses that are available in the group, or if they have completed all of the courses and their status is set to Completed, it may no longer be possible to remove them from the group.
Resetting User Passwords
To generate WordPress password reset emails for users that may have forgotten their passwords, select the user(s) from the list, and a Send password reset button will appear. Click Send password reset and the user will be emailed a link to reset their password.
Adding Users in Bulk
Users can be added in bulk by clicking Users > Add multiple, or by clicking Users > Upload Users and uploading a CSV file.
The Upload Users form has options similar to those described above, with one major difference. When uploading a CSV file, you can choose not send an email to the list of users you are uploading. You might want to do this if you plan to distribute enrollment keys to your users some other way.
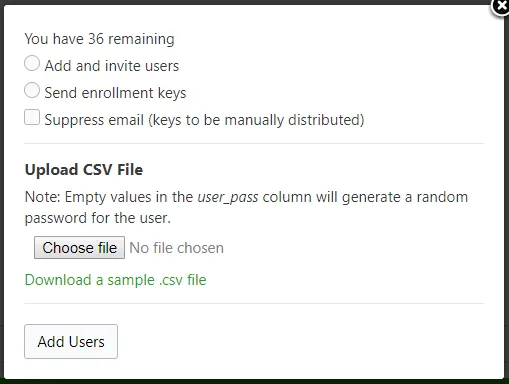
For the bulk upload to work properly, a CSV file formatted with the following column order and headings must be used: user_email; user_pass; first_name; last_name. CSV files that have incorrect formatting of email addresses, column names, etc will not be uploaded. You can download a sample file here: group_management_user_upload (.CSV file, 74 bytes). If the user_pass cells are blank, a random password will be used, but the column heading should still be included. A column for “username” can optionally be included as the first column but is not required; if it exists but is left blank, username will default to the email address.
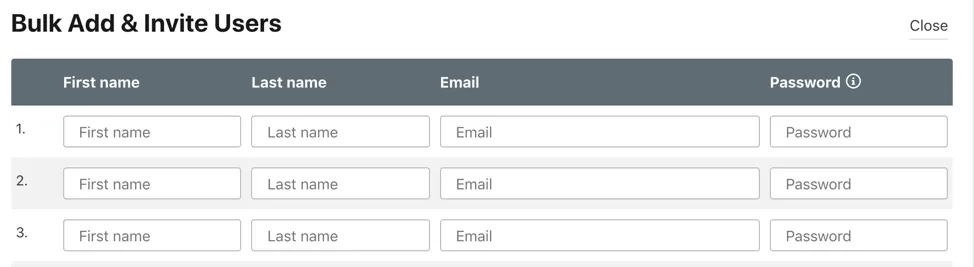
If you click Users > Add multiple, the Bulk Add & Invite Users form (added in version 2.6) appears.
Users added to this form will receive an email based on the email message settings set up by SoFA. The users are added to the list of users in the group and they take up a seat in your group, and their status is set to Not Started.
Emailing Group Members
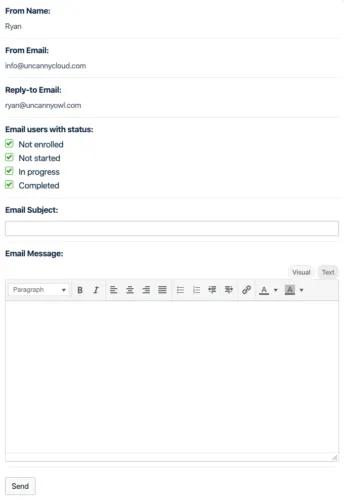
Group Leader can easily email all members of their group based on their course status (Not enrolled, Not started, In progress and/or Completed). Clicking Users > Email Users brings up the email group members interface.
Emails sent via this interface use the Group Leader’s name as the From Name, the Group Leader’s email address as the Reply-to Email, and the From Email address in Uncanny Groups > Settings as the From Email. This is to reduce the likelihood that the emails are flagged as spam. Members are sent the email via BCC, so group members will not see each others’ email addresses.
Note that this feature is not available by default. On your Group Management page, you must add the group_email_button=”show” attribute to your You do not have permission to manage groups. shortcode to display the button to Group Leaders.
Adding Additional Group Leaders
The lower section of the Group Management page is your Group Leaders list, and this list also has buttons located above it for adding, or sometimes removing, Group Leaders. Similar to the Enrolled Users list, the Group Leaders list displays the current Group Leaders by first name, last name, and email (see Fig. 5).
Fig. 5. The Group Leaders List is where you can identify, add, or remove Group Leaders.
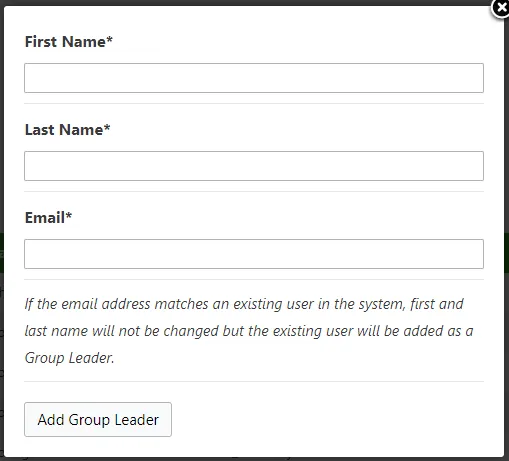
Adding more Group Leaders to your Group is even easier than adding users. Click the Add Group Leader button. Fill out the first name, last name, and email address of the person you would like to add. If you enter the email address of an existing user, the form will not alter the First Name and Last Name fields of that user, but will add them as a Group Leader, and send them a welcome email. If the user you added as Group Leader is new, they will be sent an email welcoming them to the site and the Group, as outlined in the email message settings set up by your administrator.
Removing Group Leaders
To remove a Group Leader, select the users you would like to remove from the Group Leaders list, and a Remove Group Leaders(s) button will appear. Click on the Remove Group Leaders(s) button. You will be prompted to confirm your action.
Group Leaders cannot remove themselves from the Group Leaders list. This must be done by another Group Leader.
This information is adapted from the Uncanny Groups documentation for the LearnDash extension.


